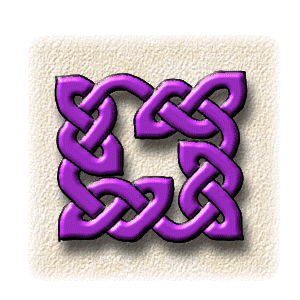
This was taught to me by a girl I met at a science fiction convention. Her name was Sarah. She learned it from a pamphlet. It has some inherent problems, but it is a simple construction technique and it learned me a few things that George Bain didn't.
For this, we are going to create a kinda complex looking knot that has a very simple set up using the Sarah method. The method is suitable to many regular knots. I haven't tried it but it should work well for long bands.
Get yourself some white paper, a pencil and an eraser. The pencil is soft because you don't want to be making indentations in the paper and also because we will be erasing all of the pencil marks later. The pencil is hard because you don't want to be leaving big gray smears. I prefer an HB or maybe a B. Get a pen; I prefer a .30 technical pen. And maybe a crayon or two; I prefer Crayola.

Make a grid of small dots on the page. For that extra bit of archaeological accuracy, make the grid not square with a ratio of 3:4.

In the middle of each little rectangle on the grid, put another dot. Look at the picture if you need help.

Pick some dots to draw lines between. For this knot, draw the lines between the dots as shown in the drawing.
There is no way that I know of to guarantee that your final knot will be a single band. Once you have some practice you will be able to look at the construction at this stage and pick out where there might be trouble.

Read all of Step 4 and Step 5 before completing them.
Draw little sections of band.
Four close dots form a rotated little rectangle. The band of the knot crosses through the rectangle and passes between the dots. In the uninterrupted rectangles, the band will pass through twice. Once above and once below.
Start at any rectangle that you want and draw to the edges.Then in the next rectangle over, draw another section of band crossing over the first.
![]()
![]()
![]()
When you get to a drawn line or the edge of the grid just bend the band. Practice will show you how the band bends and you will discover your own prefered treatments. In this band, you will see that I have chosen a pointy corner. Some may prefer a rounded corner.

If you do it exactly like I've outlined above, you can end up running into some troubles. You will find that when you are finished the band doesn't look perfect. That it is torn at some cross overs. Gets ugly. This happens because you end up eyeballing the continuity. Instead, just draw lines right through the cross overs.
![]()
Use this time to make sure that your band has a consistent width through the whole knot. Also make sure that the overall look is smooth an pretty. On this picture here, the transition section between the upper right and lower right quarters of the knot is a little too stiff and sharp. I should round it out. Don't be afraid to draw multiple lines until you find a line that you like. In the end, it'll all be cleaned up.

This step is optional. Depends on your own taste, how messy the initial plan is and the importance of the final work.
Take your eraser and clean up a little. Don't erase so much you mess up the paper. Erase through crossovers so you have a clear visual cue which parts of the bands to draw and which to not draw. If you have any lines that are thick with repositioning, clean up some of the extra fatness to help you see the correct line.
Step 7 is going to be inking and you want to do that with a nice smooth not too slow hand. If your pencil work is clean and decisive, it is easier to ink the lines you want. If your pencil work is kinda messy it is easier to make inking mistakes.

Draw your final lines in ink. While you are doing this, you can make last minute corrections that you missed before. You also have to watch out for corrections that you need to make because of inking errors. Pay careful attention at the cross overs to make the band look continuous.
Wait for the ink to dry. Erase the last of the pencil work.

Embellish.
![]()
![]() Maintained by Peter M. Gruhn
Maintained by Peter M. Gruhn