
A nozzle is simply a Painter image.
With special rules and interpretations. I'll try to explain those rules and how to set out an image to meet those rules.
Most nozzles you see have more than one sub-item (do they have a name? leaf? frame? cel? bit?). No particular NEED to do this. A single frame nozzle will work. But setting up a multi frame nozzle is one of the tricky bits.
Most nozzles are masked so that only the shape of the important part (each candy cane, heart, leaf) is painted and not the big ugly background that it sits on. So we'll worry about that part too.
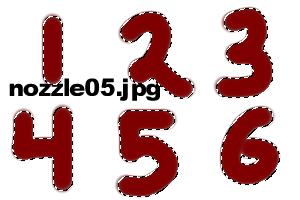
I think I want to do this in two stages. Start a new image.... 300 wide by 200 high with a background color of white.
Your nozzle is going to have six frames and they all need to be the same size. In order to help with this, go to the menu to Canvas: Grid: GridOptions... and set horizontal and vertical both to 100. I like to turn Transparent Background on. Because I'm like that.
Then Canvas: Grid: Display Grid.
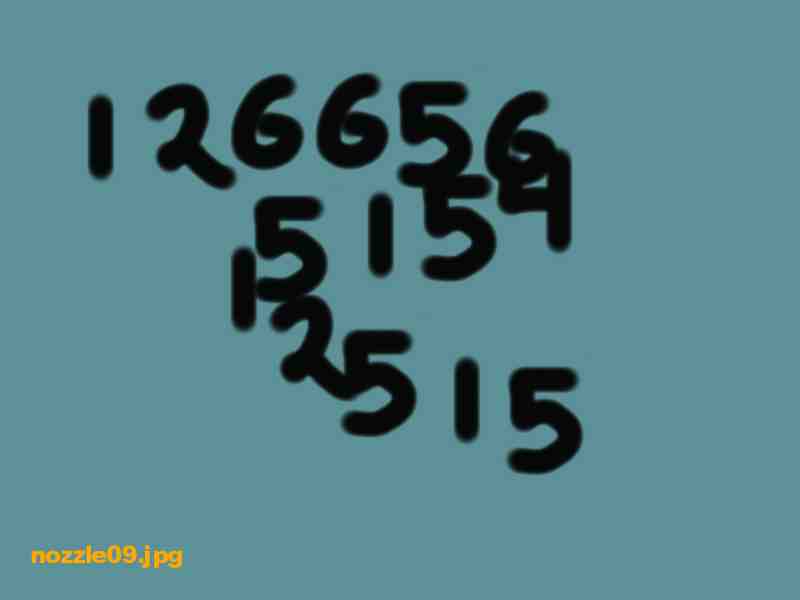
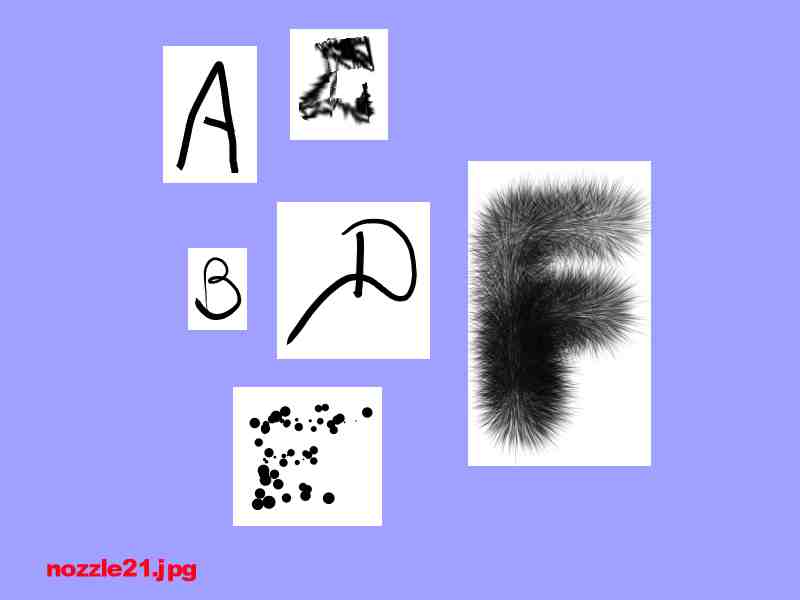
Pick a brush. Pick black. Paint a number in each box. Your painting should look like my painting. LOOK AT MY PAINTING!
OK, now save your painting. I'm using "numbers.rif" as a name. You would do well to follow my lead.
Start a new drawing. This is going to be our nozzle test space. Make this one bigger (I'm going with 800x600) to give us a bit of space to scribble on. Also, it might be a good idea to make it an odd color to help make it obvious if something is or isn't happening. I chose a sorta half dark cyan sorta thing. Not so dark that I wouldn't see black on it. Not so light that I wouldn't see white on it.
Choose Image Hose.
On the brushes palette, the Nozzle menu, Load Nozzle. Open "numbers.rif".
A dialog pops up to ask you obscure questions. They are...
Item Width
Item Height
Index Rank
Rank 1
Rank 2
Rank 3
Ah, that answers that question. Each thing in a nozzle is an "item".
How big was that grid we made? 100x100. So your width is 100. Your height is100. I forget what Index Rank is for. Look it up in the docs. Since we will not be playing with multi rank nozzles today, I think we just may well not care. try leaving "Index Rank" at 1 and we'll see how it goes.
Since we aren't using ranks, and we don't have a "no ranks" option, we must have one rank. We want all items in rank one. So for "Rank 1" enter the number of items.
SIX (6).
IIRC, the correct answers for Rank 2 and Rank 3 are, respectively, "1" and"1". Let's have a go...
Click OK.
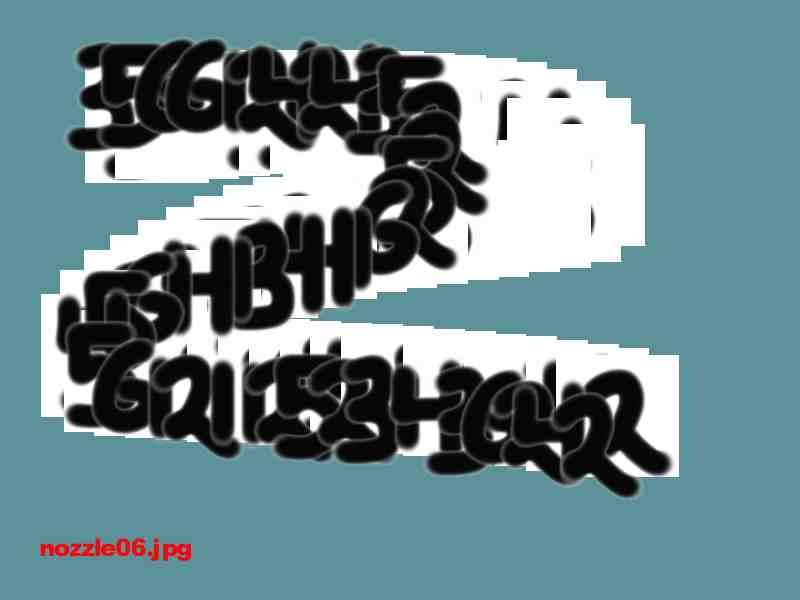
Right, I'm wiggling my mouse. I'm holding the button down. I'm getting completely and utterly nothing. How about you? Look at my painting. Admire my big blueish nothing. Mock me.

OK, the secret here is that nozzles determine opacity based on the current selection saved with an image. The numbers.rif file we just saved had no selection. (IIRC, it was the canvas mask in P5.5 and earlier. Once they allowed multiple masks per layer, they switched it to selection). With no selection, there is no opacity. So you are painting with a perfectly valid completely transparent nozzle.
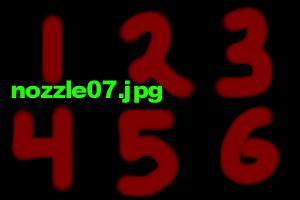
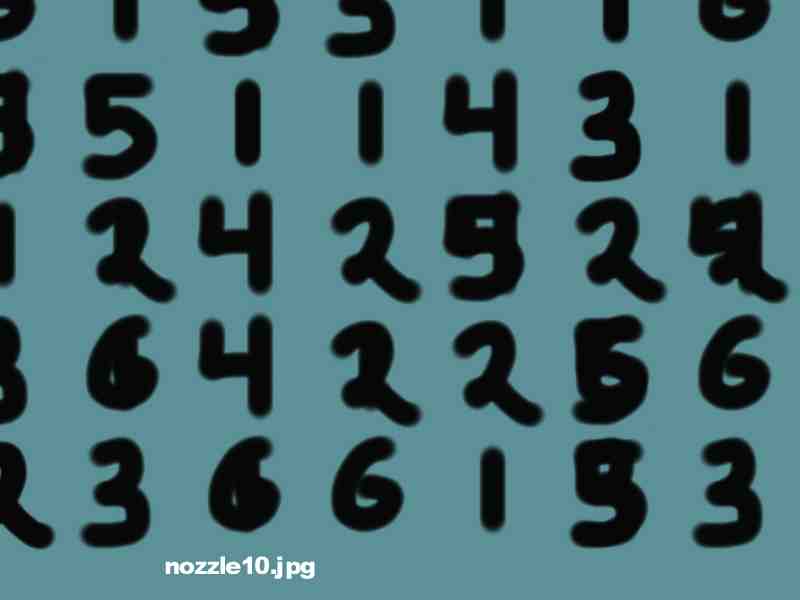
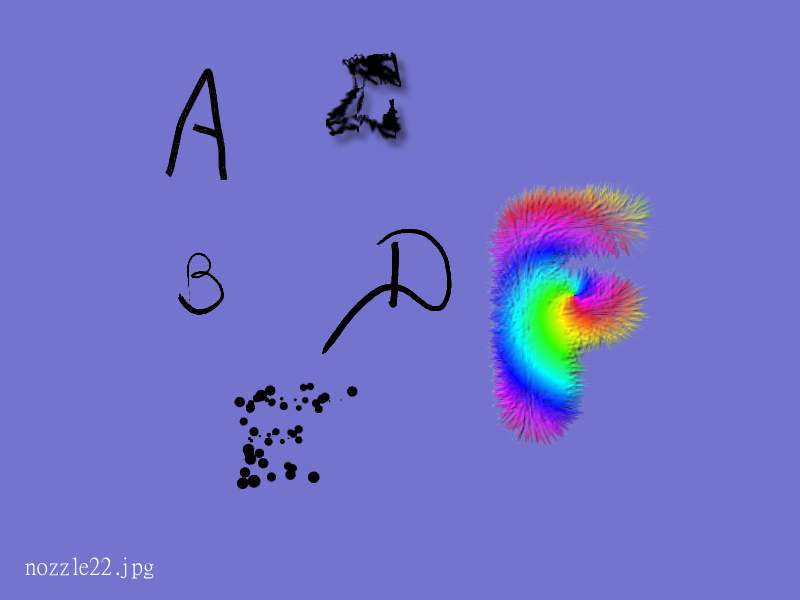
So you need a selection. Switch back to your numbers image. Go to the menu and snag Select: All. Then File: Save. Now back to your scratch image. Load nozzle. numbers.rif, 100, 100, 1, 6, 1, 1. Paint. Your image might hopefully look like mine.

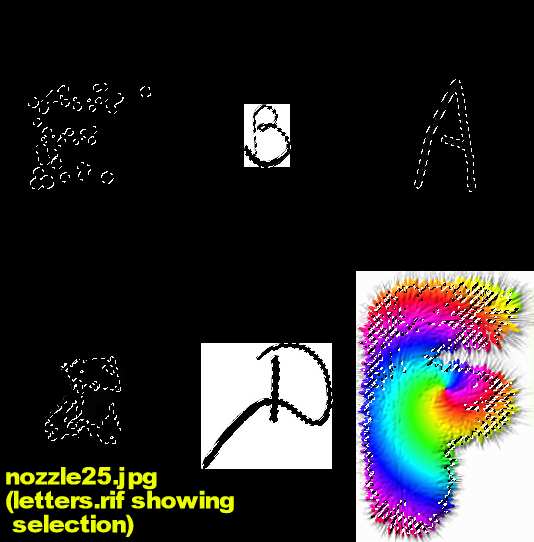
OK, we are making progress. The whole selection made the nozzle entirely opaque. We need to refine the selection. Lucky for me, we made this image black on white. Black is opaque, white is transparent. All we need is a selection. Easy way... Make numbers image current. On the Masks palette, the little triangle pops a menu down. Pick Auto Mask... Using - Image Luminance. OK. Your black numbers probably look a little red. That's the mask showing through.

Back to the masks palette. Button "Load Selection". Load From - whatever the name of the mask you just created is. PROBABLY "New Mask 1". This makes a selection of marching ants around your numbers.
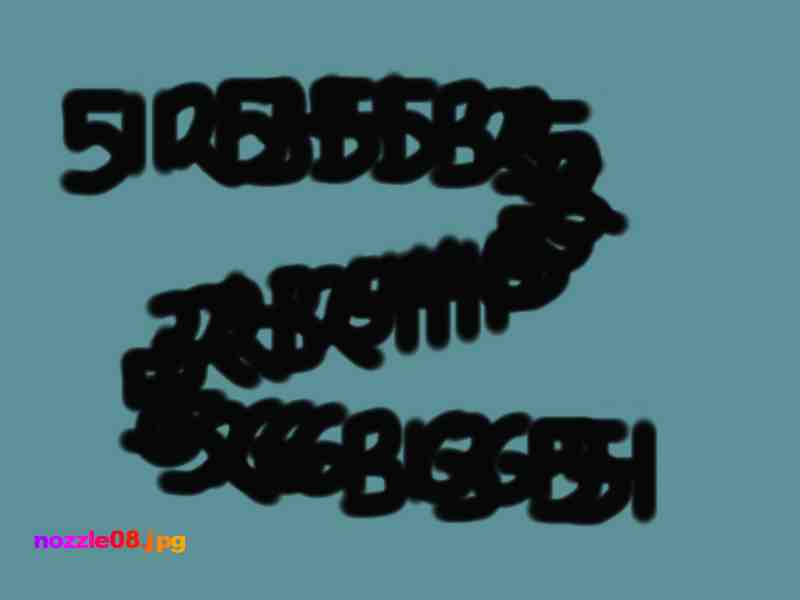
File: Save. Load Nozzle. numbers.rif, 100, 100, 1, 6, 1, 1. Paint.
You should have something that looks like...
You'll note the gray fringe around the numbers. That's because your numbers have gray fuzzy edges and the selection is based on that gray so you've got half gray half painting on color. half gray half on blue shows up lighter than black half on blue. Hunh? Who cares. How fix?....
Back to numbers image. Select: None. Check the Masks palette and make sure that "RGB - Canvas" is selected, NOT the mask. Pick the Paint Bucket tool(flood fill). On the Controls palette, turn tolerance all the way up, Feather all the way down and Anti-Aliasing off. Select black color. Click in the image.
Image should fill all up with black. Mine still shows the red mask because I haven't ever said "turn the mask visibility off".
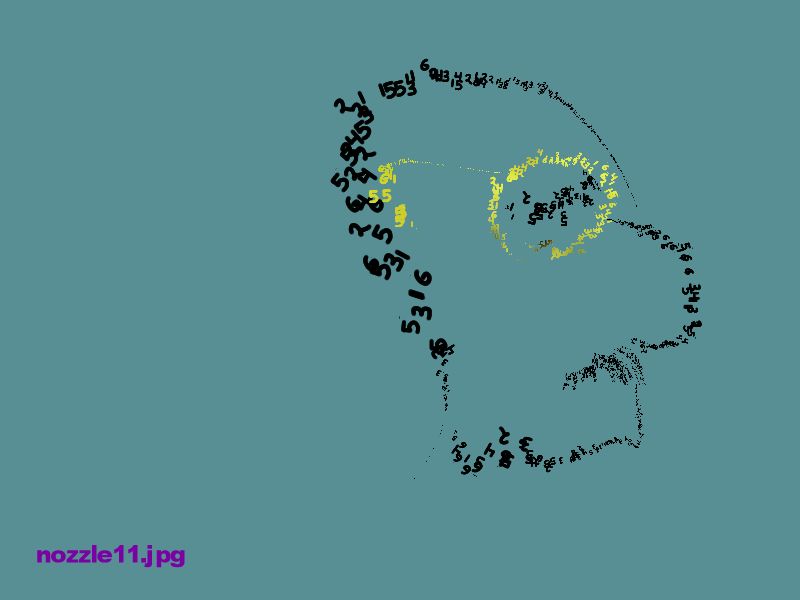
Painter remembers the most recent selection, so just smack File: Save. Back to the test image. Load nozzle. Pause a second. Click once on numbers.rif and look at the preview picture. Fully black. That's because you just filled it with black. I don't know how to solve that problem. Continue on. 100,100, 1, 6, 1, 1. Now paint. All your colors start as black with some degree of transparency so they blend with the background nicely. I'm going to clear my canvas and do a fresh swoosh of numbers...
These are a little close together, so the Spacing Palette turn spacing up. I happened to stop at 139% for
Or maybe on the Nozzles palette [X] Use Brush Grid for
Play around with some stuff.
That works well for a new image that you can set up and draw in the little boxes already happy and stuff. What if you've already got an image with bits that you want as items?
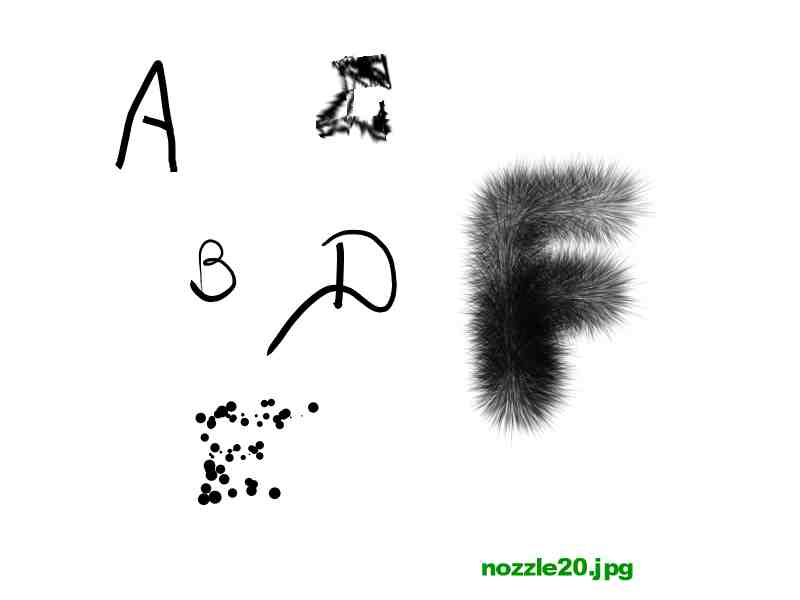
Use the selection tools to turn them into layers (floaters in olden time parlance). One layer per item. I filled my background in blueish just to emphasize that I've just gone and floated the black bits.
Since I've got a bunch of black on white again (how convenient) I'm just going to use automask. You may have to get fancy if you've got colors and stuff. This is a nozzle lecture, not a mask lecture. After I make my masks, I'm going to add some colors and maybe a drop shadow or two....
No, I'm going to crash Painter. Sigh.... Save early. Save often.
Once all your potential items are each on a separate layer go to the layers palette and select all of them (shift click)(or use the pointing finger tool to select them in the image. whatever)
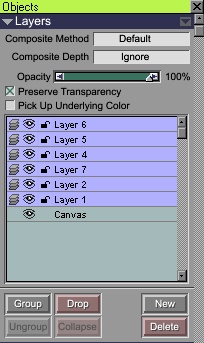
Click the Group button. Go to the Nozzles palette. From the little triangle menu Make Nozzle From Group. Painter creates a brand new image all set to save as a nozzle.
Have a look at File: Get Info.... It already contains the info needed to make a single rank nozzle so after you save the image then load as a nozzle you won't get the obscure looking dialog.
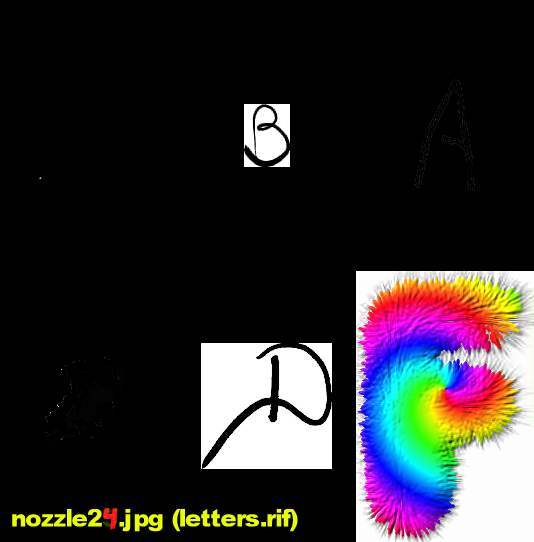
Mine has some very black areas because I already painted some of my layers full black. others I didn't. But the current selection saved with the images correct. Have a look at
Paint.
Good night. - gruhn